Are you looking for a way to make money online as a freelancer? Do you want to showcase your skills and services to potential clients? Do you want to have more control and flexibility over your work schedule and income?
If you answered yes to any of these questions, then starting a freelancing website might be the perfect solution for you.
A freelancing website is a platform where you can offer your services to clients who need them. You can set your own rates, choose your own projects, and work on your own terms.
A freelancing website can also help you build your reputation, portfolio, and network in your industry.
But how do you start a freelancing website from scratch? What are the steps involved in creating a successful and profitable freelancing website? In this blog post, we will guide you through the process of starting a freelancing website in 5 easy steps. Let’s get started!
How to Start a Freelancing Website
Step 1: Choose a niche and a target market for your freelancing website

The first step in starting a freelancing website is to choose a niche and a target market for your services. Your target market should be people who want your services and who are willing to pay for it.
Choosing a niche and a target market can help you stand out from the competition, attract more clients, and charge higher rates.
Here at Hotskills, our niche is web design blogging. We focus on providing valuable insights, tips and advice that people can use to improve their websites.
To choose a niche and a target market for your freelancing website, you need to do some research and analysis. Here are some questions to ask yourself:
- What can you do for 10 years straight without ever feeling bored?
- What problems do you solve?
- Why is it valuable?
- Who is an ideal client for you?
- What are their goals, challenges, needs, and preferences?
- How can you reach them and communicate with them?
Once you have answered these questions, you can narrow down your niche and target market and focus on serving them with your freelancing website.
Step 2: Register a domain name and a hosting service for your website

The next step in starting a freelancing website is to register a domain name and a hosting service for your website. A domain name is the address of your website on the internet. A hosting service is the space where your website files are stored and accessed online.
Choose a domain name that is relevant to your niche and target market, easy to remember and spell, and unique and catchy. Tools like Namecheap or GoDaddy can help you search for available domain names and register them for an annual fee.
One important thing you should be extra careful is finding a hosting service that is reliable, fast, secure, and affordable. Bluehost or SiteGround is perfect for a finding a place that suits your needs and budget. They also offer free domain name registration for the first year.
Step 3: Install a WordPress theme
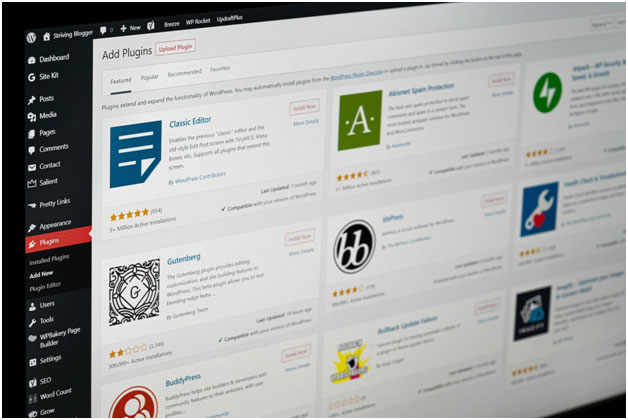
WordPress is a good starting place as it is easy to use and very effective.
WordPress is the most popular and powerful platform for creating websites. It offers thousands of free and premium themes that you can choose from and install on your website. You can also use plugins to add more features and functionalities to your website.
You can start a WordPress site within minutes. All you need is a WordPress theme. A WordPress theme is a template that determines the layout, design, and functionality of your website.
On top of that, using a readily availabe WordPress theme is better than hiring a someone to do it as web design costs can get out of hand quickly.
You can choose among countless free or affordable WordPress themes to use in your website.
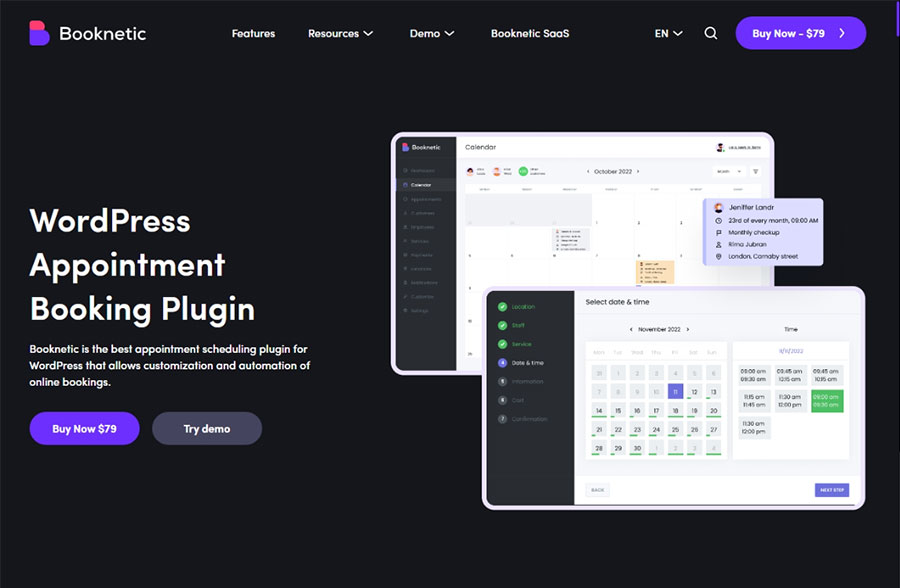
Step 4: Use Booknetic to schedule with potential clients
The fourth step in starting a freelancing website is adding a scheduling option to your website. It gives your potential clients a direct link to you. After that, you can schedule a call, understand your client and sell your services accordingly.
One of the best ways to offer scheduling in your WordPress website is using an online scheduling plugin. In that case, Booknetic can be helpful to you.
Booknetic is a WordPress plugin that allows you to create and manage online booking systems for any service. You can customize the appearance, functionality, and availability of your booking forms and calendars. You can also integrate Booknetic with popular payment gateways, email marketing tools, and SMS notifications.
It makes it the perfect scheduling option. If you are just starting out, make the calls for free, don’t set durations and take your time to know your customer better.
As you progress, you can automatically generate Zoom links, set limits for call durations, schedule recurring calls and even create waiting lists for your services!
To place a scheduling widget on Booknetic, follow these steps:
- 1. Install and activate the Booknetic plugin on your WordPress dashboard.
- 2. Go to Booknetic > Settings > General and configure the basic settings of your booking system, such as currency, time zone, date format, etc.
- 3. Go to Booknetic > Services and create the services that you or your freelancers offer. You can add details such as name, description, price, duration, category, etc.
- 4. Go to Booknetic > Staff and add the staff members who provide the services. You can assign them to specific services and set their working hours and days off.
- 5. Go to Booknetic > Forms and create the booking forms that you want to display on your website. You can choose from different templates and customize the fields, colors, and texts of your forms.
- 6. Go to Booknetic > Shortcodes and copy the shortcode of the form that you want to use as a widget.
- 7. Go to Appearance > Widgets and drag and drop a Text widget to the sidebar or footer of your website.
- 8. Paste the shortcode of the form into the Text widget and save it.
Now you have placed a scheduling widget on Booknetic. To add a scheduling option to your freelancing website, follow these steps:
- 1. Go to Pages > Add New and create a new page for your booking system.
- 2. Paste the shortcode of the form that you want to use as a full-page booking form into the page content and publish it.
- 3. Go to Settings > Permalinks and choose a custom structure for your booking page URL, such as /booking/%service%/%staff%/.
- 4. Go to Booknetic > Settings > Design and enable the option “Show service list on booking panel”.
- 5. Go to Booknetic > Settings > URL Settings and enter the URL of your booking page in the “Booking Panel URL” field.
Step 5: Promote your website through social media, SEO, email marketing, and other strategies
![]()
You have created your freelancing website and added some content and portfolio pieces. Now what? How do you get people to visit your site and hire you for your services?
The answer is promotion. You need to spread the word about your website and showcase your skills and expertise to potential clients. There are many ways to promote your website, but here are some of the most effective ones:
Social media:
Social media platforms like Facebook, Twitter, LinkedIn, Instagram, and Pinterest are great places to share your website and connect with your target audience. You can post updates about your work, share valuable tips and insights, showcase your testimonials and reviews, and engage with your followers.
You can also join relevant groups and communities where you can network with other freelancers and potential clients. Make sure to include a link to your website in your bio and posts.
SEO:
Search engine optimization (SEO) is the process of improving your website’s visibility and ranking on search engines like Google and Bing. SEO involves optimizing your website’s content, structure, speed, and performance for relevant keywords that your potential clients are searching for.
For example, if you are starting freelance writing, you want to rank for keywords like “freelance writing“, “copywriting services“, “hire a copywriter“, etc.
But it is a hard task, so you should go niche topics or focus on local SEO.
To do SEO effectively, you need to do keyword research, create high-quality content that matches the search intent, use proper headings and tags, optimize your images and videos, build backlinks from other authoritative sites, and monitor your analytics and performance.
Email marketing:
Email marketing is one of the most powerful ways to communicate with your prospects and clients. You can use email marketing to build trust and rapport with your audience, showcase your value proposition, educate them about your services, share case studies and success stories, offer discounts and incentives, and encourage them to take action.
For effective email marketing, you need to build an email list of people who are interested in your services, create engaging and personalized email campaigns that provide value and solve their problems, use catchy subject lines and clear calls to action, segment your list based on their interests and needs, and test and optimize your emails for better results.
Other strategies: There are many other strategies that you can use to promote your website depending on your niche, goals, budget, and preferences. Some of these strategies include:
Guest blogging:
Guest blogging is writing articles for other websites or blogs in your niche or industry. This can help you establish yourself as an authority in your field, reach a wider audience, drive traffic to your website, and build backlinks for SEO.
Podcasting:
Podcasting is creating audio content that people can listen to on their devices. You can either start your own podcast or be a guest on other podcasts in your niche or industry. This can help you showcase your personality and voice, share valuable information and insights, build trust and credibility with your audience, and drive traffic to your website.
Webinars:
Webinars are live or recorded online presentations that you can host or join on topics related to your services. You can use webinars to demonstrate your skills and expertise, educate your audience about their problems and solutions, offer free consultations or assessments, and generate leads for your services.
Online forums:
Online forums are platforms where people can ask questions, share opinions, and discuss topics related to your niche or industry. You can join online forums like Quora, Reddit, Stack Exchange, etc., where you can answer questions related to your services, provide value and advice, showcase your portfolio pieces or testimonials, and link back to your website.
Conclusion
You have learned how to start a freelancing website in five easy steps:
- Step 1: Choose a domain name and hosting service for your website
- Step 2: Install WordPress and choose a theme for your website
- Step 3: Add essential pages and plugins to your website
- Step 4: Create content and portfolio pieces for your website
- Step 5: Promote your website through social media, SEO, email marketing, and other strategies
Now it’s time to take action. Don’t wait for the perfect moment or the perfect website. Start today with what you have and improve as you go along.
Remember: Freelancing website is not static. It’s a dynamic tool that you can use to showcase yourself as a professional freelancer who can deliver quality work for clients.
So what are you waiting for? Start creating your freelancing website today!